Test Automation with Selenide: Run Selenoid with Docker Compose file

Selenide and Selenoid are popular test frameworks with great capabilities you just need to explore for reducing time spent on typical bugs and have business logic in a focus. Running Selenoid with Docker Compose file adds even more advantages to the whole process.We’ll take some basic Selenide project with TestNG, check its core features, learn how to connect our project with Selenoid, and run it with Docker Compose file. That will be simple, the only a few steps to follow.
1.Selenide + TestNG + Maven
To build and manage our project we’ll use Maven, therefore we need to configure our pom.xml file. The main dependencies and a compilation plugin with properties for Maven to compile sources of the project — check below. We chose TestNG as a testing framework.
Pom.xml
2. Page Object classes
Now we can start to create our page objects. There are two classes below. Main Page class describes the main page of https://www.wikipedia.org/ and Result Page class describes page with search results.
Check the main locators:
The first — searchField is defined by ID, the second — searchButton, defined by xpath.
The typeSearchData() checks if searchField is visible, sets a value to this field, and, in the end, returns the current object this.
The second method searchData() responsible for clicking on searchButton and, as a result, it returns ResultPage. Returning current page objects or new page objects allows us to use chaining in test classes.
Main Page
On the Result page Selenide element is defined with ID locator for the Result page header. It responds to search data and, also, define a getter for this element.
Result Page
3. Test class creation
Test class represents a simple test: open the Main page, search data, go to the Result page, check the Result page header.
WikiTest
4. Docker and its advantages
Docker is a tool based on OS-virtualization for delivering software products in packages, named containers.
The chief Docker’s advantages refer to:
- Convenient isolation of application.
- Consistency.
- Scalability.
- Maintainability.
- Clean monitoring.
Speaking about Docker, we should also define its main objects:
- Images — snapshots and read-only templates with instructions on Docker container creation.
- Containers — runnable instances of the image.
- Services — tools, allows you to scale containers.
5. Docker installation
For installing Docker use the next command on Ubuntu:
$ curl -fsSL https://download.docker.com/linux/ubuntu/gpg | sudo apt-key add — && sudo add-apt-repository “deb [arch=amd64] https://download.docker.com/linux/ubuntu $(lsb_release -cs) stable” && sudo apt install docker
Also, you have to install Docker Compose tool:
$ sudo curl-L “https://github.com/docker/compose/releases/download/1.27.4/docker-compose-$(uname -s)-$(uname -m)” -o /usr/local/bin/docker-compose && sudo chmod +x /usr/local/bin/docker-compose
For MacOS and Windows go to https://hub.docker.com/, register and download Docker desktop application.
6. Selenoid and its advantages
Selenoid is a server that allows running isolated browsers in a Docker container.
Advantages:
- Fast and simple installation.
- Resources consumption and utilization.
- Isolated environment.
- Multiple browsers version support.
- UI and logs.
7. Compose file creation
We’ll optimize Selenoid installation with the help of the Docker Compose file.
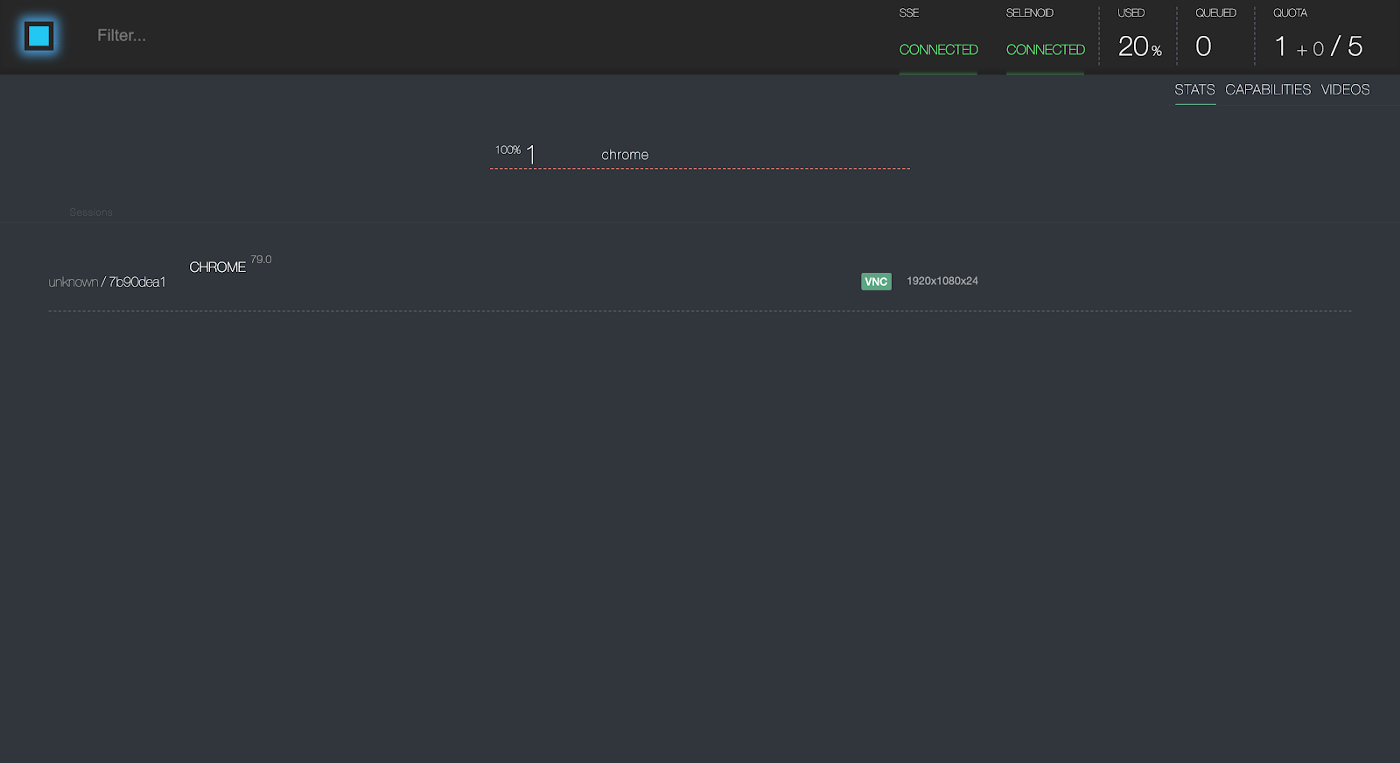
Below you can see the Compose file in the 3rd version. It includes the next services: Selenoid, Selenoid-UI, and Chrome_79. In the Compose file, you can notice a network named “Selenoid”. It should be created before running the Compose file. To do it, use the following command: docker network create selenoid.
More detailed information about the creation of the Docker Compose file you can find here: https://docs.docker.com/compose/gettingstarted/
Compose file
Selenoid service is the main hub and based on Selenoid image.
Selenoid-UI is a user interface for tracking logs and changes during test execution.
Chrome service based on Chrome image with version 79.0.
As I`ve explained earlier, all containers in Docker are isolated from each other. Concerning this, for communication among different containers and outside Docker’s ecosystem, we should set outer and inner ports. Outer port — 4445 in Selenoid is applied for access to Selenoid Docker container with inner hub port 4444. Outer port 8083 in Selenoid-UI is used for access to Docker Selenoid-UI container with inner port 8080 and check test execution in a browser.
Also, don`t forget to add browsers.json file with Chrome configuration in the project folder:
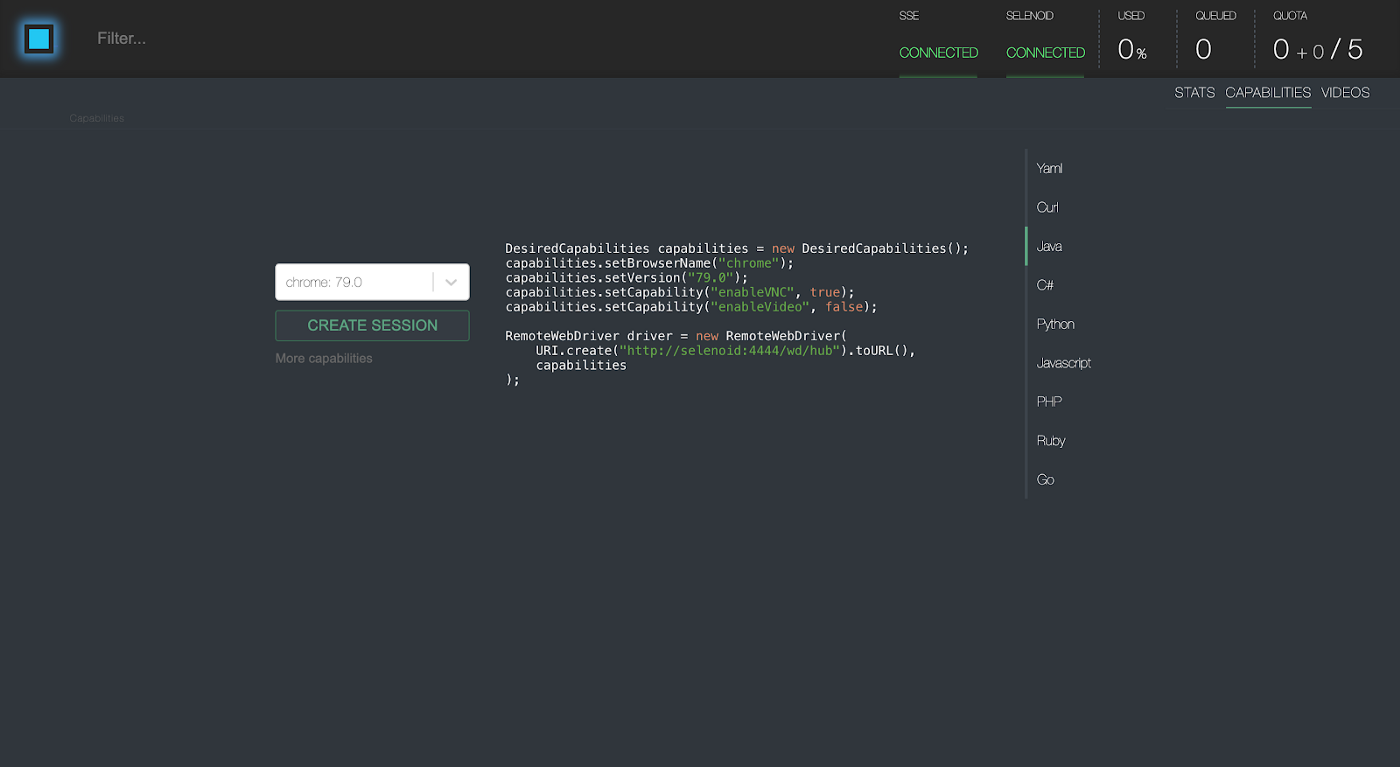
8. Set capabilities for the test
Let’s modify a bit @BeforeClass setUp method and add Selenoid configurations:
To start Selenoid — open the terminal, go to the project’s directory, run the command docker-compose up, wait till Selenoid services will start. Now, it’s time to execute your tests.

Hints and tricks
From first sight, it may look easy to configure Java Automation Test framework with TestNG, set remote hub, and run tests. But there are some hidden obstacles you can meet.
- When dealing with Docker, it’s a bit difficult to understand, how to launch environments in containers. There are a lot of commands and volumes to run each one separately. Moreover, every container has its own inner and outer port, that could be confusing. With the Docker Compose file all you need — is to set the required containers’ parameters and use one command for launching.
Put all these parameters in the Docker Compose file and just write docker-compose up in the console instead of:
- The real difficulties may occur with the right configuring of the Docker Compose file. In this case, make sure, that all ports respond to ports set in the remote configuration of the setUp method. It’s important to pay attention to volumes and not to forget about your Docker network creation.
Recap
Employing Selenide +Selenoid with Docker Compose file is a cost and time-effective solution. I use this approach to my project, and it helps me to reach more profitable results. Speaking from my own experience, the performance became flexible, accurate, and much faster. The Docker compose file makes it possible to run only one command instead of several, so I have more time for optimization and getting top-quality in short terms.
I hope, this article was a helpful read for you. Stay tuned for new articles.


Let's engineer your breakthrough

79015, Smal-Stotskoho St. 1 Ukraine
50-062, Plac Solny 15 Poland


